Custom Automations are here! Now, you can easily design and enable your own custom email and SMS automations, giving you full flexibility with your automated marketing campaigns. By pairing this new feature with Marsello’s other tools, such as RFM Segmentation and your loyalty program, you’ll be able to create the perfect email flow or SMS Campaign that stands out and sees results.
With Custom Automations, the options are endless. Automate campaigns that send to specific customer segments or trigger when a customer makes a purchase. Automated flows are perfect for requesting reviews, creating a referral email series, offering a post-purchase follow-up service or a timely cross-sell, just to name a few ideas.
Let’s check out an example of a retailer who’s seen success using Custom Automations.
Home Goods Hardware encourages window shoppers to complete a purchase
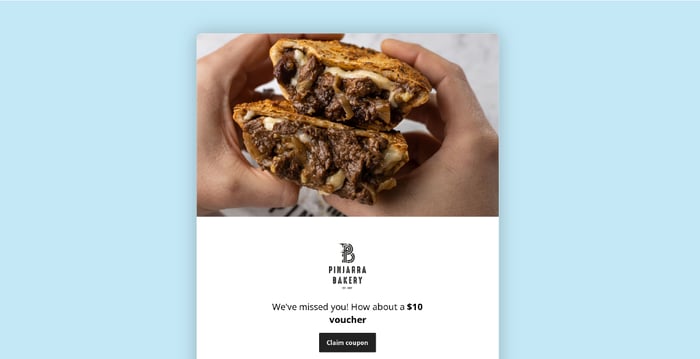
Window Shoppers can be notoriously tricky to convert to loyal customers. This hasn’t dissuaded Home Goods Hardware, though. The beautifully branded homewares store, based out of Australia, was one of the first to create a Custom Automation and we love their ingenuity.
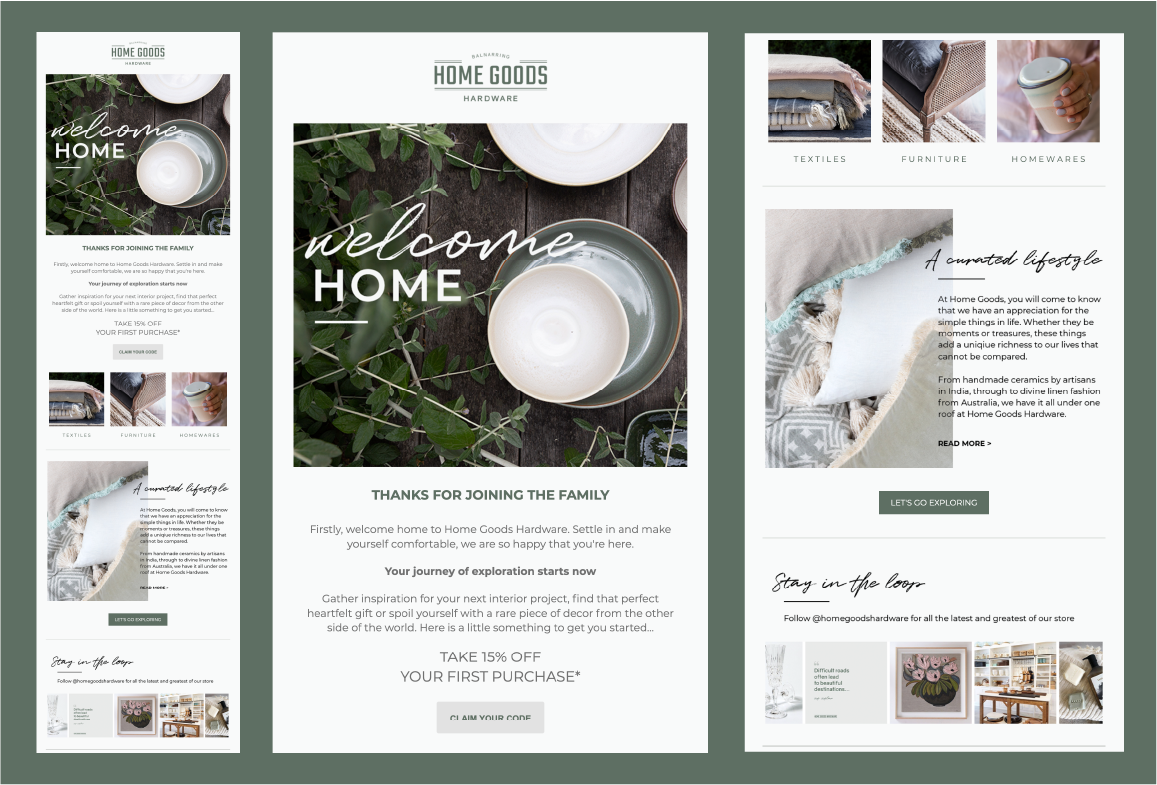
The campaign features just one simple email that welcomes customers within the Window Shoppers (those who’ve created an account with the store but not completed a purchase) segment and encourages them to make a purchase with a 15% off discount code. With a 49% open rate and 7.5x ROI, Home Goods Hardware are reaping the rewards of automated marketing and we love that they’re doing so by targeting smaller customer groups. There are only 512 customers within their segment and with a 4.2% conversion rate, they’re really making the most of a potentially forgotten customer group.
Read more about Home Goods Hardware’s success with Custom Automations.
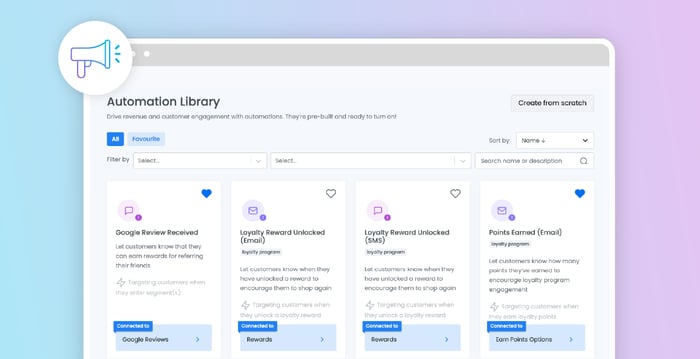
To create a similar style of Welcome Newsletter to Home Goods Hardware, try customizing and enabling the “Welcome Newsletter Sign-ups” template found at the bottom of your Automations admin. This easy-to-use template is set up to target customers who’ve only just signed up (1 hour after they’ve created an account), and encourages them to make a purchase by offering a 10% discount. Customers then exit the flow when they have made an order or the flow ends.
Let’s take a look at how you could use Custom Automations.
Integrating customized automations into your marketing
First thing’s first, the Custom Automations feature isn’t restricted to email campaigns! With the incredible open rates of SMS marketing (as much as 5x that of email marketing), they’re a powerful tool to add to your marketing campaigns.
This isn’t to say that email marketing is anything to be sniffed at! With a drag-and-drop email builder, customizing your emails to showcase your brand and products is as easy as selecting what content you’d like to include.
As we mentioned, Custom Automations are perfect for asking customers to leave reviews, incentivizing referrals, following up with customers after they’ve shopped, welcoming customers who’ve shopped recently, and more. Let’s break down some of these ideas
-
Requesting Reviews – The ins-and-outs of requesting reviews and customer referrals are quite similar when it comes to defining an audience; you’ll want to target customers who are loyal and have shopped recently. Add a delay to your automation that targets customers 5-7 days after their purchase, giving them time to receive the product (if bought online) and use it. Make sure to be clear where you would like them to leave a review too! If you use social media most often, add your Social Icons with the email drag-and-drop builder.
-
Incentivizing Referrals – Much the same as requesting reviews, target loyal customers! Try setting up your automation to target customers who have shopped recently (last 5-7 days), and shopped more than three times. Remind them that this is an easy way to earn loyalty points and that their friend will also receive a gift too (ensure you’ve enabled your referral program within your Loyalty Program settings).
-
Post-purchase Follow-ups – If you’ve got a product that needs to be replaced regularly (subscription-based beauty products would be one example), you could create an automation flow that reminds customers to refill their order after three or so months.
-
Welcoming Customers – Welcome new customers who’ve not yet made a purchase. Similar to Home Goods Hardware’s campaign, you could target customers who have signed up within the last day but not yet made a purchase, Each message within your flow could incrementally offer your customers a slightly higher discount, encouraging them to make a purchase. Alternatively, you could simply customize and enable the Welcome Newsletter Sign-ups automation which is found within the Automations tab of your Marsello admin.
Let’s delve into the actual set-up of automated flows to help you understand these ideas a little better.
Setting up your Custom Automations
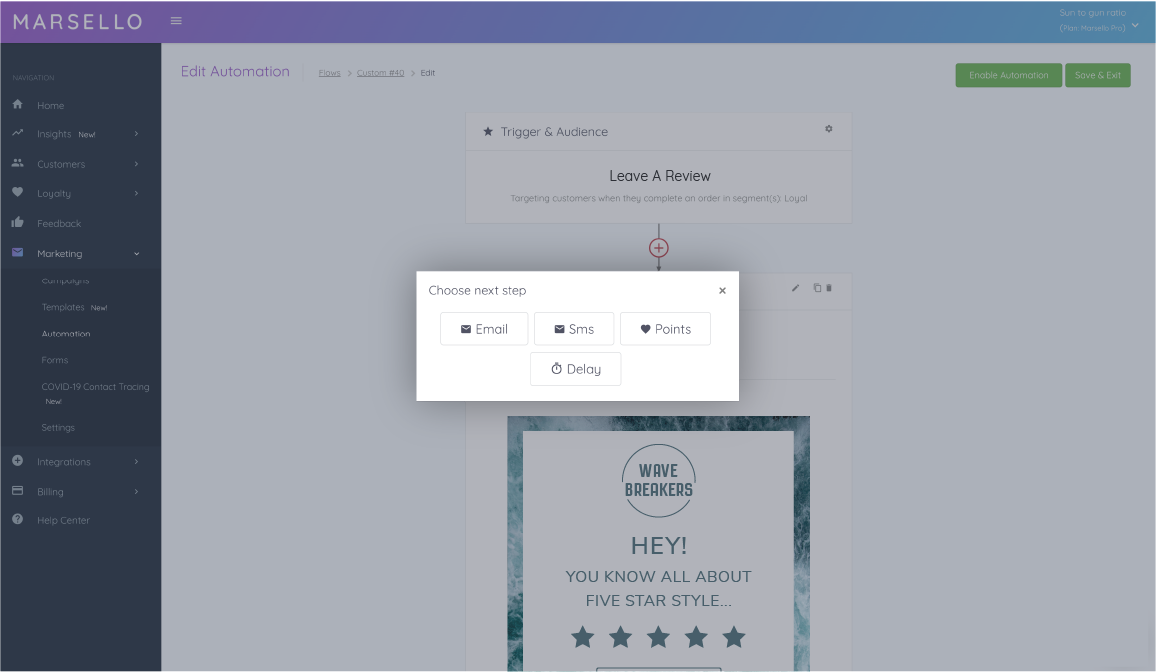
You’ll find Custom Automations under the ‘Automation’ section of ‘Marketing’ within your Marsello admin. Once you’ve elected to create a Custom Automation, you’ll have a range of options that that help you set up your automation flow.
-
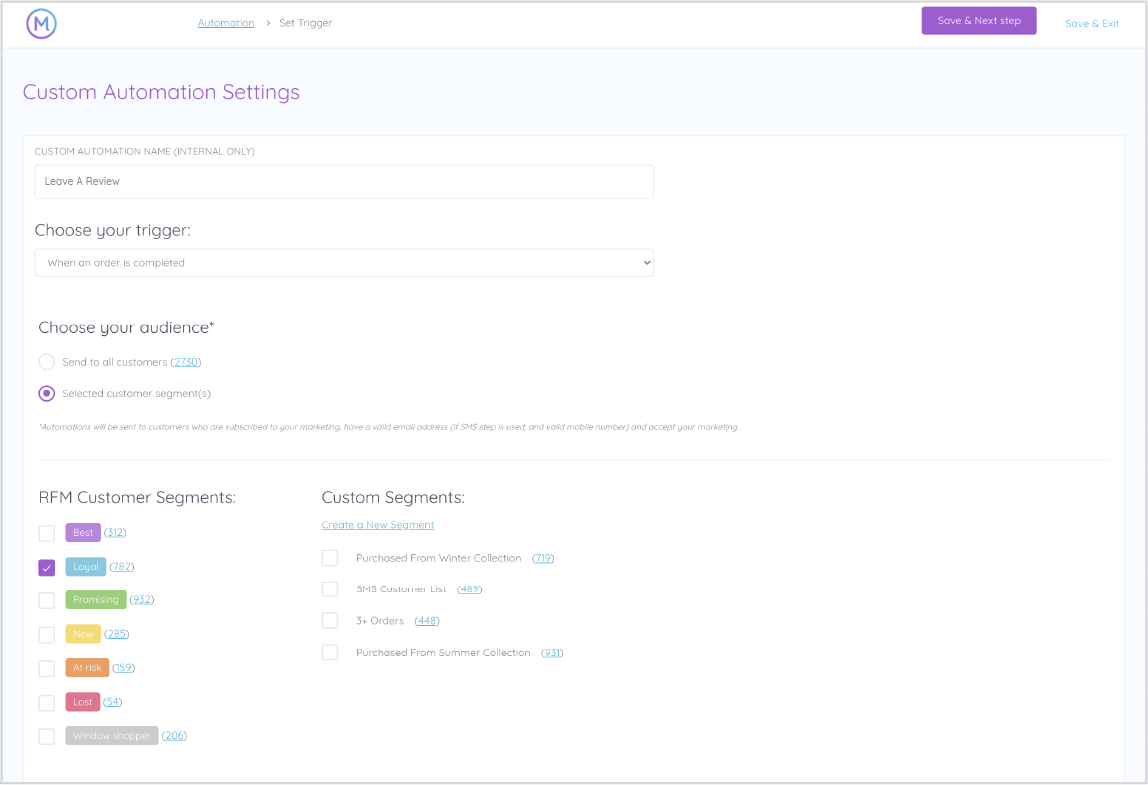
Name your automation. While your customers won’t see this, it will help you to find the automation within your admin and adjust or track its results.
-
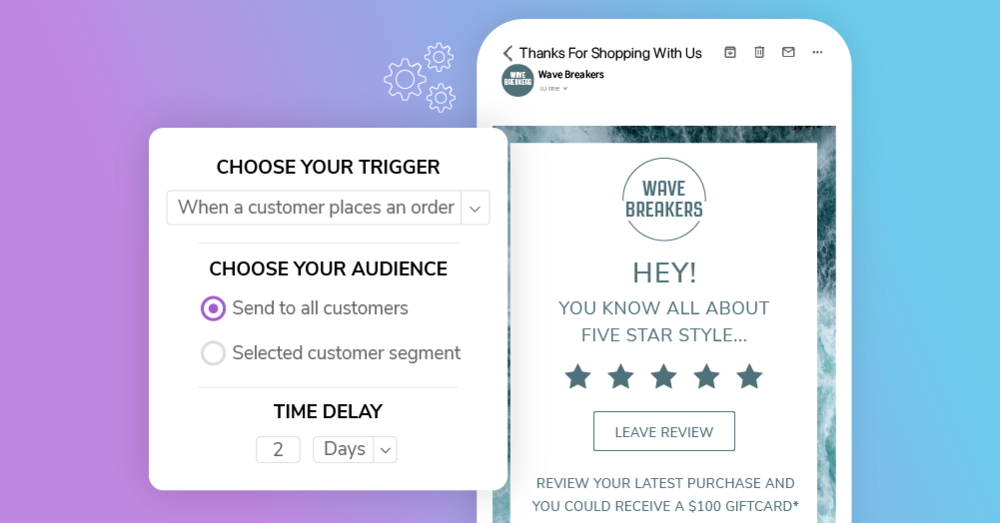
Choose your trigger. Depending on what trigger you select, this will dictate how your customers enter the automation’s funnel. This essentially means that your customers must complete a specific action to receive your automation. Your trigger options include:
-
When an order is completed – When a customer makes a purchase, they will enter the funnel for your automation.
-
When a customer enters a segment – When a customer has been added to the segment because they have met the segment conditions. This is where your Custom Segments come in useful and allow you a lot of flexibility with marketing to specific customer groups.
-
When a customer signs up – When a customer has signed up via the POS, eCommerce, or an email collection features.
-
-
Choose your audience. Select which Customer Segment(s) you want to target with your automated campaign. Not only can you opt to use the pre-existing RFM segments found in Marsello, but you can also create your own segments. For example, if you wanted to create a campaign to say, “thank you for your first purchase” that’s specific to just your online customers, you could create a segment that specifically excludes customers who shop in-store. The beauty of custom segments is that you can really drill down into specific sets of customers and create targeted marketing that not only sees results but really engages those customers and helps to foster their loyalty to your brand.
-
Choose your ‘exit conditions’. These are the conditions which specify when a customer will leave the flow. There are two options, which include:
-
‘When a customer makes an order or completes the automation flow’ – This is the default setting and ensures that the customer will leave the flow when they complete a purchase, or (if they do not complete a purchase) they will receive the entire automation flow. This condition is best used when the goal of your campaign is to incentivize customers to make another purchase.
-
‘When a customer completes the automation flow’ – Automations with this exit condition will deliver all messages within the flow to the customers, regardless of if they make a purchase or not. This condition is best used when the goal of your campaign is to build a relationship with your customers, encourage loyalty or provide education.
-
The options don’t end there when it comes to customizing your Custom Automation. Let’s take a look at the finer details of setting up your automation flow.
How to customize your automated flow
As we mentioned, with Custom Automations, you aren’t just restricted to email marketing. Why not follow up an email with an SMS to really make use of those powerful open rates? Perhaps a time delay could help improve your open rates by positioning your messaging at a better time for all customers?
For clear instructions on how to add-to and customize your automation flow, we’ve created an in-depth help article.
This part of the customization process will allow you to add time delays, emails and/or SMS to your automation flow, as well as making it simple for you to award loyalty points. Details of each of these additions are as follows:
-
Time Delays – Adding time delays to your flow will enforce a delay between the end of the previous step (usually when the first message is delivered), and the next is due to send. It’s best to ensure a decent delay time to give your customers time to view your first message; we recommend around 48 hours.
-
Emails – Add an email as a step in your flow. It’s common to add a time delay before adding a new email to your flow. Once it’s added, customize your email to suit your messaging, branding and goal.
-
SMS – Add an SMS as a step in your flow. As with email, it’s common to add a time delay before adding an SMS to your flow. Remember, SMS customization is more restricted than email and there are some content requirements that you’ll need to ensure you take note of. Check out the Custom Automation help centre article to help you craft an undeniable SMS addition to your campaign.
-
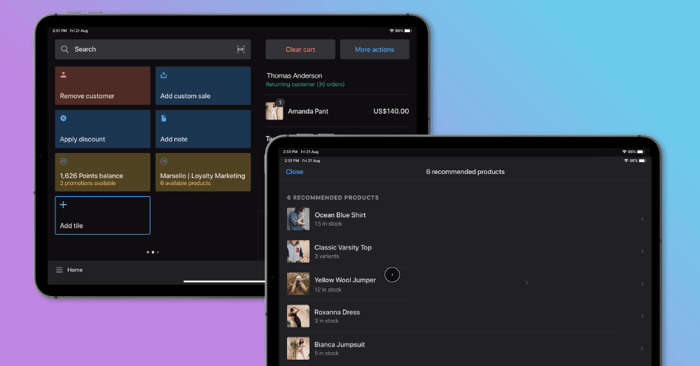
Loyalty Points – Adding loyalty points as a step will automatically add a specified amount of points to your customers’ accounts. Simply input the number of points you’d like to award and select how you would like to let your customers know that they’ve accumulated points.
Let’s check out an example of a retailer who’s seen success using Custom Automations.
Final words:
Looking forward to creating your first Custom Automation? Check out our Custom Automation help centre article to help you create powerful automation flows that your customers will love.
We’d love to see what Custom Automations you come up with – if you have an automation flow that you’re proud of, feel free to let us know by contacting us in our website chat window.
This feature is now available for all MarselloPro users. Not a MarselloPro user? Upgrade or sign up today to access Custom Automations and many more exciting features.